
Category: Engineering
WorkOut App Update 1
I spent this past few days learning a bit about modeling database . When I began to implement the New User registration I just created a big table that held the user in this order:
id | firstname | lastname| username|password
Just to test the connection between the Java application and the MySQL Database on my “local server”.
But once I started thinking of my overall goal: To track my workouts
I realized that I was going to need a better way to store my information on the Database. I’ve used MySQL before on previous projects like the Navigation Path Game I created a year ago but I’ve never had to build something that could possibly have to store a great amount of information. So I broke down that big table into four different tables that I will join in my application:
id | username
username_information: username | password | firstname| lastname| address | email
username_workouts: date | workout_bodyType | workout_type: 4/18/14| chest | benchpress
username_workoutType: id | date | reps | amount of weight
Each bold word is a different table. I split them this way to reduce redundancy and to meet the 2nd and 3rd order Normalization.
WorkoutApp Intro
This past weekend I spent most of my evening browsing the Android and iOS App Store for an app that could help me track my gym workouts only to find that most of them are useless. Most of the apps are very time consuming and over crowded with useless features. Although, I found some that were quite simple and straight forward they lacked features that I needed. Simple features like accessing the information on the cloud through my laptop or adding a superset.
So like the engineer I am, I thought of developing the perfect app for me instead of wasting more time looking for it. Here’s to the next few weeks of developing. Let the fun begin…
To begin these are the main features I would want on my app:
- Access the information anywhere (laptop, iPhone, web)
- Avoid too much time login information. I believe it should take less than 3-5sec
- Be able to see if I broke my PR (personal record) by lifting heavier or doing more reps with a certain weight.
The first part is the easiest. I spent a day or so working on the log in and new user feature. You can find that on my GitHub.
(Note: I’m not worried about the GUI yet, so far I’m just focusing on working on the back-end of it)
Creating the Limit For the Counter
I was going to start building the counter first, but then I realized that it was going to be a bit more time consuming due to the fact that we have to initialize it to 0 before counting. Now since there is going to be a counter, there has to be a limit to it, right? Think of a for-loop or while-loop, there is always an limit or end or it will run infinite amount of times; which is something we do not want.
So what is the limit? Or how do we find it?
It took me a day, and a lot of analyzed examples, to figure out what the limit should be (note: this might be different for others but it worked on my binary divider). Now, I figured out that the position most significant figure bit of the Dividend can be used as the limit to the execution of the algorithm. This meant that all I had to do is get the position of the MSB of the Dividend and set that equal to the limit of the loop.
This was simple to create when using a Priority Encoder. Now, I wasn’t sure if I was allowed to use this chip and I didn’t want to bother the professor so I just created one from the logic chips. I mean, I am building this entire project using only the 7400 IC series.
So the inputs of the Dividend were placed in a Priority Encoder and then the output was the limit to the loop of the algorithm. Somewhat confusing huh? Not really. It makes perfect sense if you actually know the algorithm I’m using.
To clarify a bit, let me give an example:
if Dividend = 0010 0010
then the MSB of it is 6
(or 5 if you’re starting from 0. Remember we’re counting from right to left. )
With this shown, the limit to the loop will be 6.
Now to implement it on SPICE.
The implementation of the Priority Encoder is simple, however, I will save it to the end and just use a sample image I got from Google:

The image shows that with a few or gates the priority encoder can be created however, there is an IC (the 74148) that will compute this and I just realized that. Thank God, I “saved it to the end” 🙂
The D’s in the image represent the Dividends while the outputs will be what our limit will be set to.
So now that we have the number we have to set our limit to how do we actually go about and create “the limit”?
Remember, this entire project is based on registers. I haven’t mentioned this at all, but the flip flops that I will be using as the registers will be the JK Flip-Flop, but you can also implement the project using the RS and/or the T Flip-Flop but might be harder if you try using the D Flip Flops. New challenge? Maybe…
Anyways, here’s the truth table for the JK Flip Flop for those of you who need to refresh:

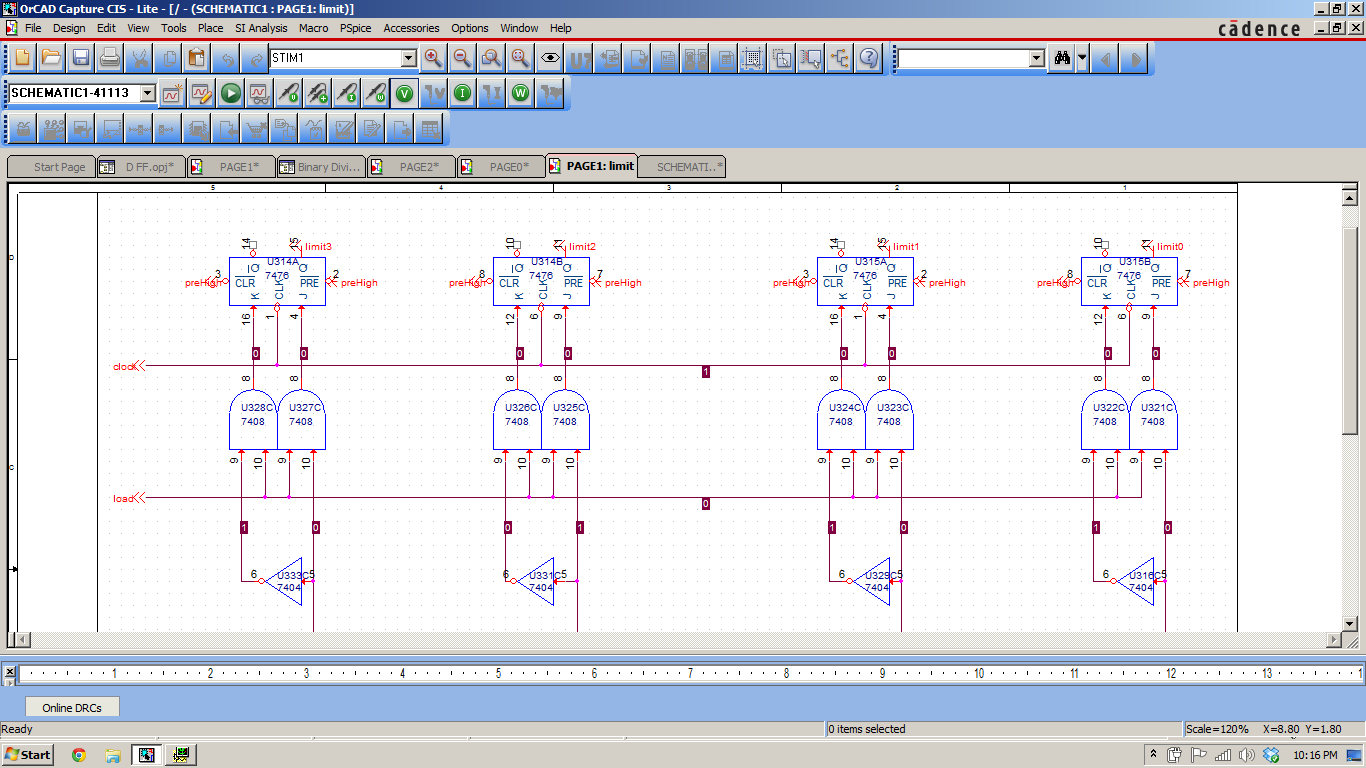
The 7476 IC chip has a set and preset feature that we can utilize but for the limit registers I decided to set both of the a logic 1, or HIGH, to pass the limit, or the number we got from the priority encoder.
I implemented the circuit on SPICE but it did not fully fit on the screen. This is part of the circuit:
 and the simulation:

This part is a little tricky here. I’ve implemented a for-loop using logic chips before so I knew from the beginning that the limit of the loop was going to be one more than the actual result that we got from the Priority Encoder. The reason is because we want to execute the loop as long as it is less than or equal to the limit. For example, if the limit is 110 (binary) or 6 (decimal) that means that the loop will need to execute seven times. That is when the counter is equal to 0, 1, 2, 3, 4, 5, and 6, which is seven times. Correct?
Since we’re comparing the counter to be equal or less than the limit (counter <= limit) and we’re comparing each bit by bit using the XOR gate, this means that we are going to have to set the limit to be +1 more than what the priority encoder outputs. So if the Priority Encoder outputs 6, the limit will then have to be 7. That way, as mentioned above, it could also execute the loop when the counter is 6 which is the the “equal” part to the “less than or equal to”. Does that make sense? I hope it does. Message me if it doesn’t. I’ll be more than happy to try to clarify it. 🙂
